Multi Level Account Hierarchy | Visualizing entire hierarchy
Recently I collaborated with Salesforce Blogger on a blog regarding reporting on Multi Level Hierarchy called Multi-Level Account Hierarchy: Flatten, Aggregate, Join, Transform and Report and this approach works perfectly if you wish to Aggregate metrics such as the no. of Accounts under the Ultimate Parent OR the no. of Opportunities under each parent and visualize these metrics in a dashboard OR if we wish to filter in a dashboard.
However, if you wish to visualize the entire hierarchy in a Table similar to the screenshot below, we will need a different approach, where we bring in all the Accounts from the Hierarchy Path.

Example of Multi level Account Hierarchy in Salesforce
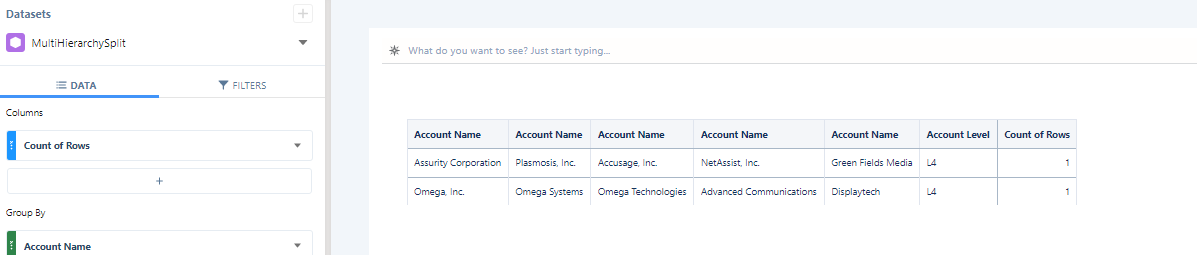
Example of Account Hierarchy visualized in a table in CRM Analytics
Before I walk you through the steps, I put together a quick video explaining what we are trying to accomplish:
Now, let’s walk through the steps in order to accomplish the table above…
STEP 1: Flatten Your Hierarchy
Bring in your Account object and Flatten it. Again, the reason we want to flatten is that we want to be able to find the path upwards in the hierarchy.
Now, when we flatten we will automatically create 2 fields: 1) hierarchy multi value field which is a list of all ancestors for each node in the hierarchy as well as 2) hierarchy path which will show the hierarchy starting with the parent ID, and all the way to the to top to ultimate parent ID.

STEP 2: Calculate how many levels you have in your hierarchy
Now, what do we do with these two fields that were calculated for us? We can leverage Split and Size functions as explained below:
First, we wil look at the Hierarchy Multi field, and if this is null then it means we are at Level 0, if not, then we will use the the new Size function (highlighted in this Blog) to return the number of elements in a multivalue! This will tell us if our Path contains 3,4,5 or more accounts!

To count the number of levels in the HierarchyMulti field, we can flag with a case statement in combination of the size function which returns number of elements in a multivalue
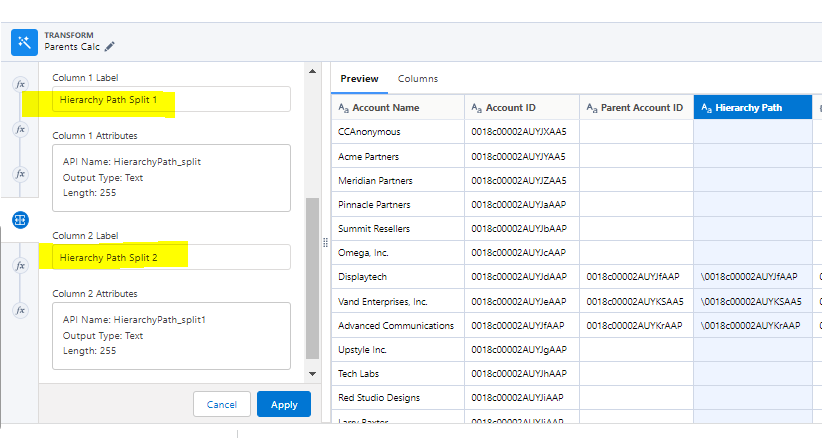
STEP 3: Extract your Accounts from the Multivalue field using Split transformation
One of the fields created will be a multivalue output column that contains a list of all ancestors on the hierarchy separated by a backlash which we will be able to separate with a Split transformation which splits the value at the first occurrence of the delimiter. In this case, our delimiter is a backlash \ This blog has more information on the split transformation: Split a multi value field:
The key in this step is to continue using the Split function to separate the string until you have no values left. So if you have 5 Accounts on the path, we would then use split 5 times.
First Split
Second Split

Third Split

Fourth Split

Note: If you take a look at the Column Label, I started renaming the spit column
Fifth Split

In my use case I have 5 levels, so I continued using the Split transformation until I was done. The key here is you need to continue using the split transformation for the no. of Accounts available in your hierarchy path.
STEP 4: Drop unnecessary columns
Now, you can also drop columns, . since we don’t need the original column and every split transformation 2nd split column that we split, add the Drop Columns transformation after the Split transformation to drop it from the recipe. From that point, the original column doesn’t appear in Preview and it won’t show up once we run our recipe.

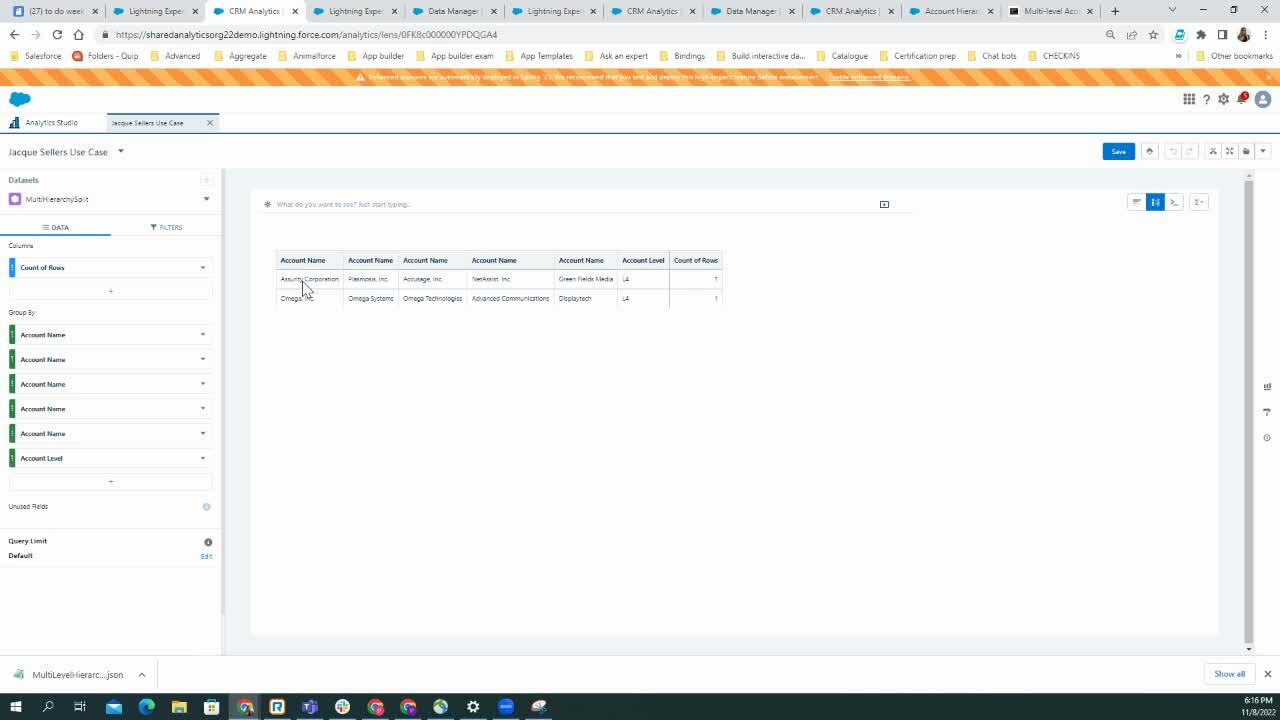
STEP 5: Test your splits in a lens before augmenting

In a compare table I added my Hierarchy Path field, along with all the Accounts I extracted via the splits. Each Split I renamed my accounts.
STEP 6: Augment to bring in Account Name
Augment bringing in Account multiple times, until you have the Account Name for all of the Accounts in your Path, your recipe will look similar to the recipe below:

Final Recipe example with my different joins and accounts
First Join

For my first augment I am using my transformation as the left and my Account node as the right matching with the Account ID to bring in the Account name.
Second Join

Third Join

Fourth Join

Now once you are done joining your Account, it’s time to run the recipe and test!
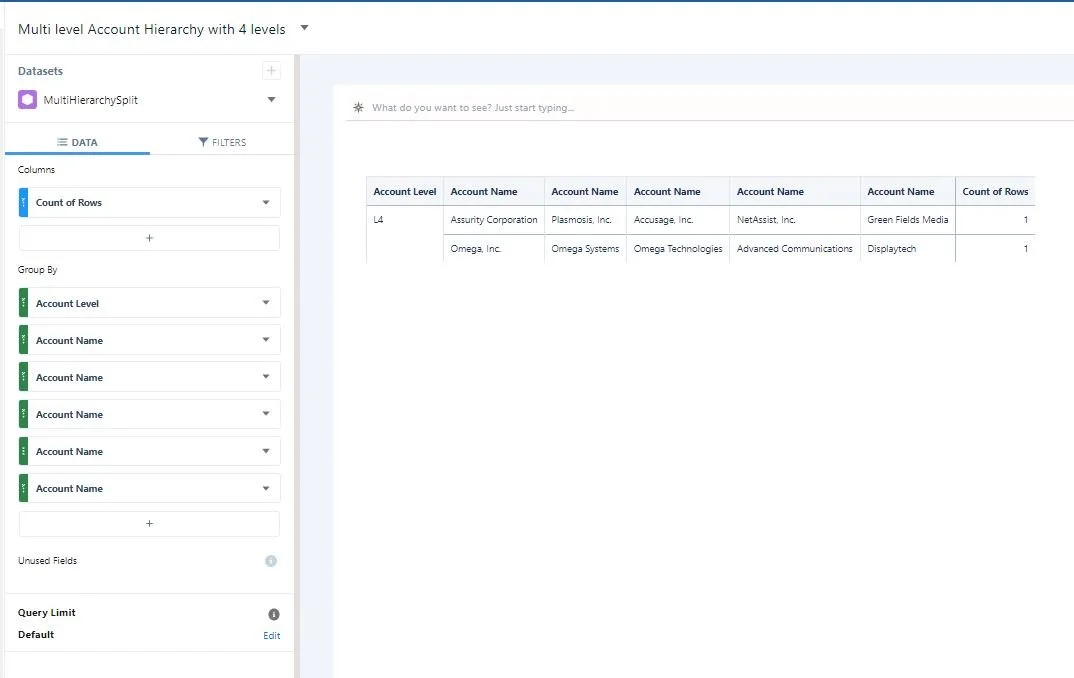
STEP 7: Test your final dataset in a lens
Now, if you just want to roll-up metrics all the way to the Ultimate Parent, I recommend you follow the steps on the original blog: Multi-level Account Hierarchy: Flatten Aggregate, Join, Transform and Report. Keep in mind you can always create 2 datasets: 1. Following the original blog where you aggregate metrics under Ultimate Parent, 2. The dataset described in this blog and then use BOTH datasets in a dashboard and just make sure you connect the data sources.
Hope this was helpful!