Snapshotting Alternatives in TCRM
What is Snapshotting and when to use it?
Snapshotting is more and more common each day- Salesforce customers who leverage Tableau CRM want to know what their data said in a specific period of time- let’s say what the data said a week/quarter/year ago and how it’s been changing over time.
Here’s where Snapshots come into play- A snapshot is basically a screenshot of your data in a specific point in time- if you are snapshotting a Dataset, an Object or a Report- we add new rows with the current date as a Snapshot Date.
Now, there are 4 different ways in which we can accomplish Snapshotting, which we will cover in this article along with pros and cons of each option and a High Level overview on how to set up each option. Keep in mind that you need a Tableau CRM licenses for all of the options below:
Option A: Trend Analytics Dashboards
Trending a Salesforce Report is the easiest way to trend in Analytics. It takes a Salesforce Report as an input and it starts taking Snapshots of your data and adds the output into a Dataset in TCRM.
In order to start trending, you can simply > Open a report > Select trend report > it will automatically create a dataset for you in TCRM.
Pros:
Easiest way to get trending set-up
Can be done directly from a report in Salesforce
You can get snapshots taken on a daily, weekly or monthly basis
Cons:
If you make any changes to this report, such as adding a new field it will stop the trending and you need to start over
It’s tied to a user; so if that user leaves the company, you most likely will need to start over
The rows add up pretty quickly; specially if you use a daily snapshot, this will begin to add up on your data row limit pretty quickly since each snapshot taken is a row of data
RESOURCES:
VIDEO: Video: Trend Report Data in Tableau CRM Trend Analytics Dashboards
Trend Salesforce reports→ https://help.salesforce.com/s/articleView?id=sf.bi_trend_create.htm&type=5
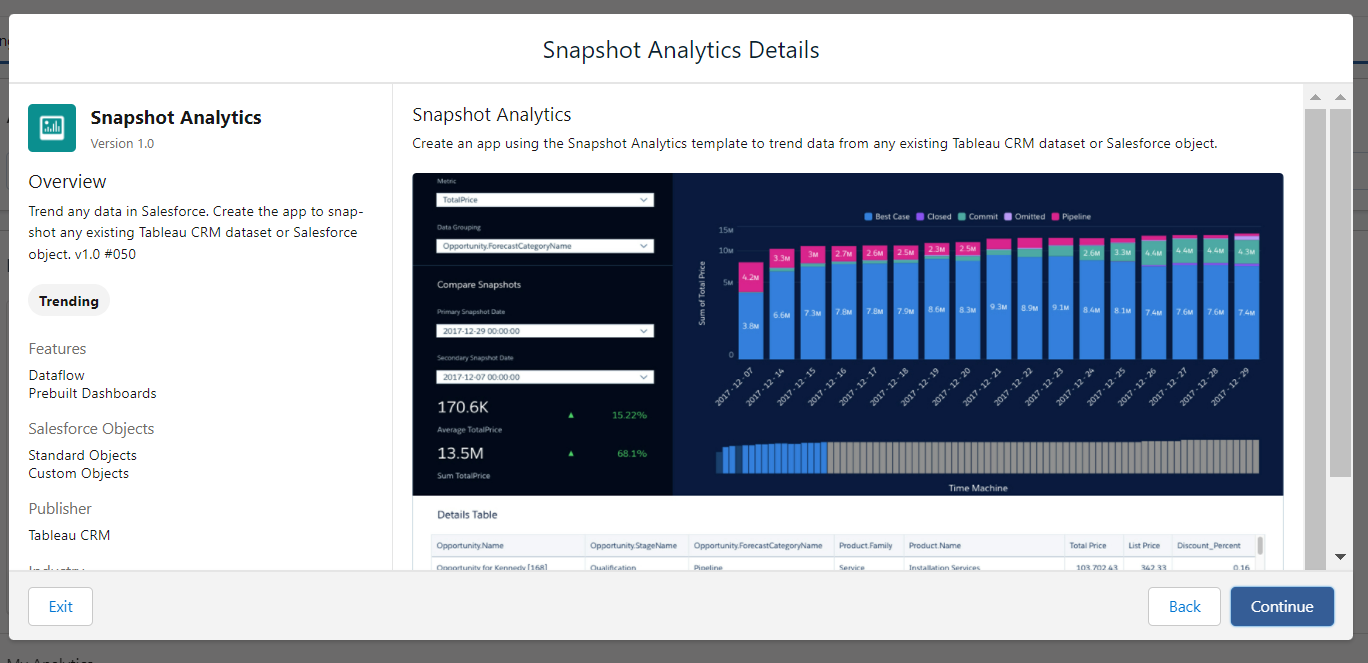
Option B: Snapshot Analytics Templated App
The Snapshot Analytics templated App is probably my favorite method for trending data! This template sets up a dataflow and dataset, and it’s easy to customize.
The Snapshot analytics template starts with the Configuration Wizard asking you if you would like to trend either an Object or a Dataset - followed by some questions to include additional fields in your templated App
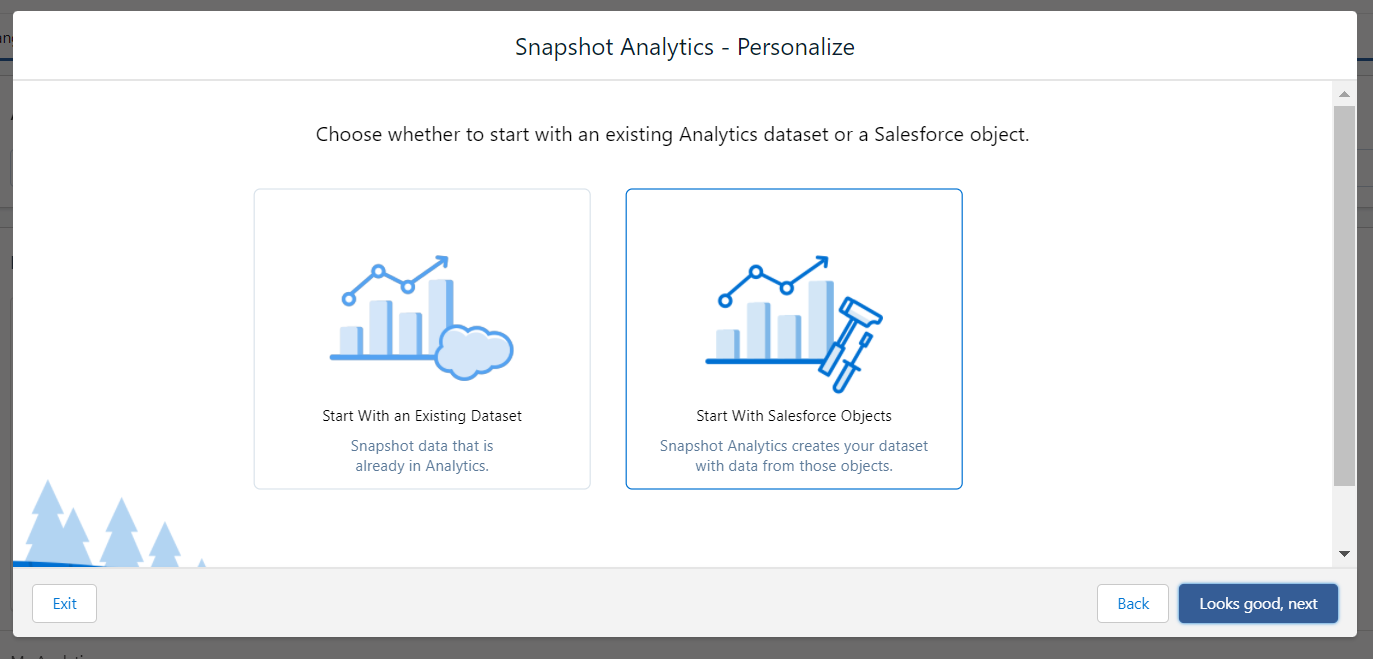
Step 1: On Analytics Studio click create > New Templated App > Snapshot Analytics App
Step 2: Select if you want to use an Object or a Dataset
Configuration Wizard on Snapshot Analytics App
Step 3: Personalize your Snapshot Analytics app with the Configuration Wizard
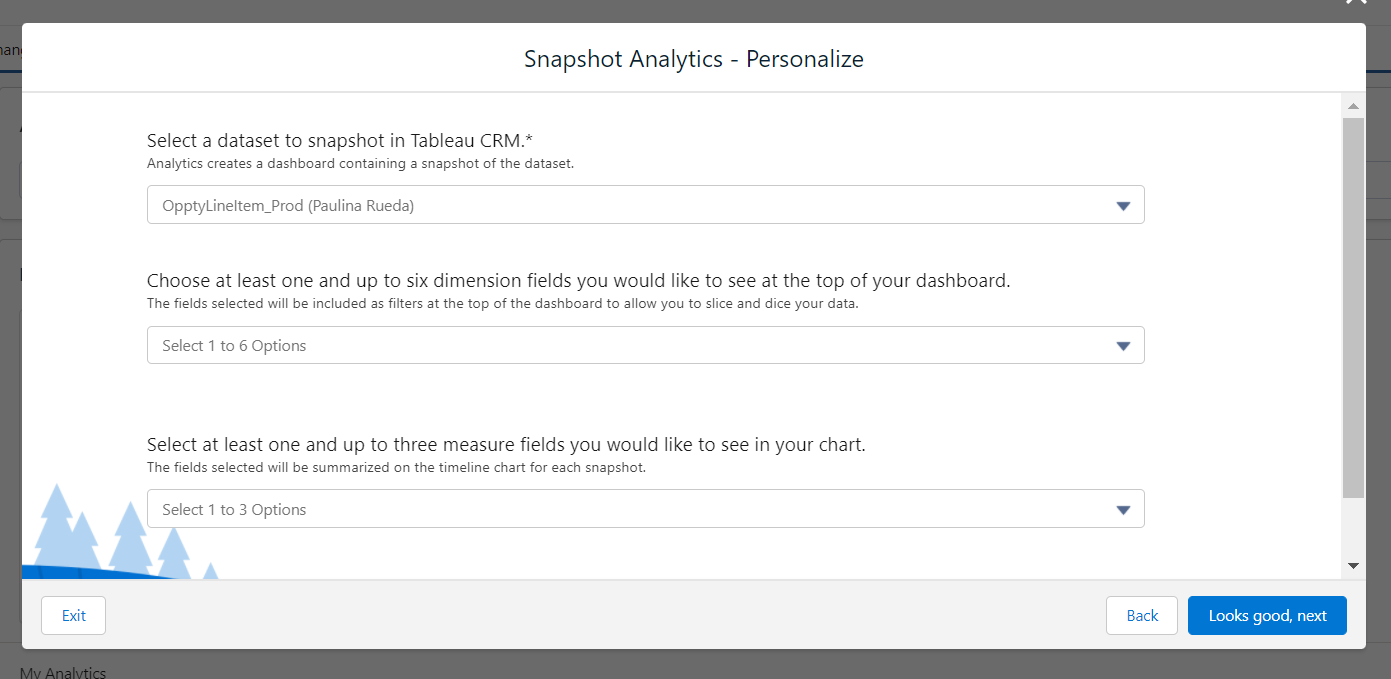
When responding to these make sure you select the fields you would like to slice and dice your data by
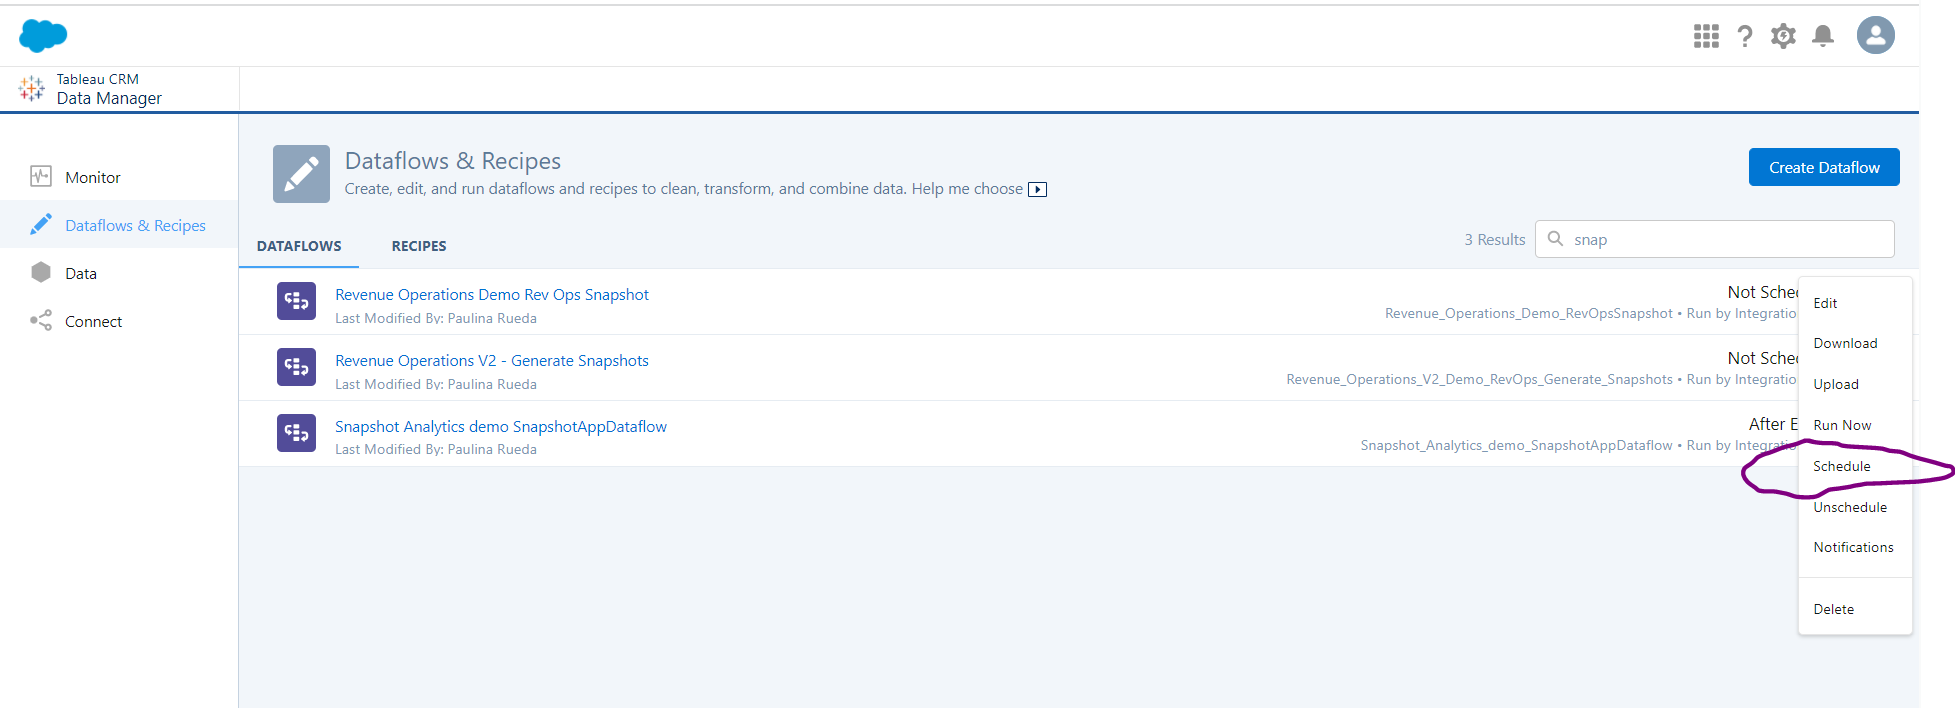
Step 4: After you set-up your Snapshot Templated App- remember to schedule your dataflow!
IMPORTANT TIP FOR SCHEDULING YOUR DATAFLOW: Schedule this dataflow after your Source Dataflow finishes. (for example; if you created your Snapshot template based off a dataset you created using the Default Salesforce Dataflow, make sure you schedule it after the Default Salesforce dataflow runs).

Pros:
This app creates a dataflow that does date based slicing and checks for duplicates of the same day and just adds the latest rows of data to the Dataset.
The Retention Logic for data is controlled by the dataflow; there’s a field called “RemoveDataFlag” which basically allows you to run your snapshot multiple times per day, only keeping the most recent snapshot for that date. Additionally, the “SnapshotFilterFlag” removes old snapshots from your dataset.
Add “IsMostRecentSnapshot” field to filter to your most recent data
Gives more flexibility as you can use either Objects or Datasets as your sources
Cons:
It uses standard TCRM functionality; you need to be acquainted with TCRM
RESOURCES:
Advanced Snapshotting Video Tips and tricks: minute 16-22
Blog: https://www.springml.com/blog/snapshotting-in-tableau-crm/
Help article: Snapshot Analytics Template:Link
Option C: Add a Snapshot in a Recipe
Similar to the Snapshot Analytics option- you can create your own Snapshot Dataset leveraging a Recipe. Now, I also love this option as it’s your very own recipe!
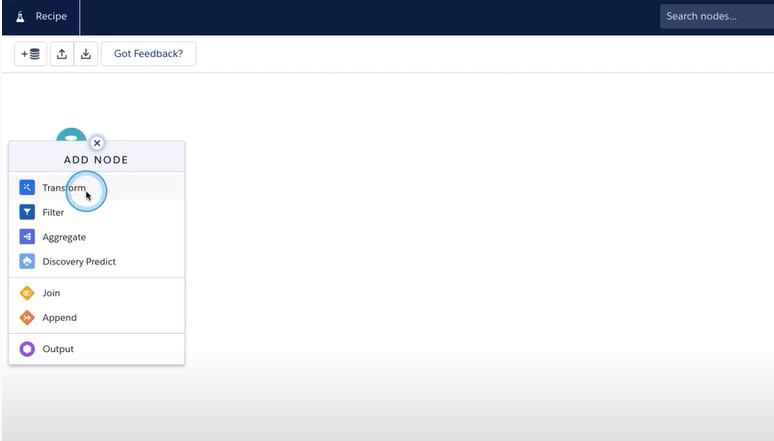
Step 1: Create a recipe and select the Dataset we created in Select data:

Data Manager > Dataflows and recipes > Create new recipe > Add Input Data
Step 2.: Add your dataset- On the example below we are using Opp account owner

Step 3. Add a transformation to add a stamp on your data- add the date stamp basically
Step 4. Create a very simple formula that returns the date, so it returns the NOW- and I can call this my snapshot Date

Step 5. Make sure the formula has the format you wat, and that it’s saved on a New Column. Once you have the correct settings in place, hit Apply and you will have a formula with a Snapshot of today on every record

Name your new field something relevant to the Snapshot Date

Step 6. Once you run your Snapshot dataset, you will return to your recipe and append the output to your original dataset; the reason for this is because it’s historical data- so my second dataset has Opp 1 of Today’s date (e.g., 4.11.2022) and tomorrow when it runs it will have the data from 4.12.2022- we are appending the data and has the snapshot date.


We will Append SnapshotDS_Opportunity to the original dataset.
Step 6. Hit Save, and and Schedule your recipe under Data Manager > Schedule recipe > every day
Pros:
You can create your own dataset and add your own transformations before Snapshotting
Very similar to the Snapshot Analytics templated App
Cons:
It does not have some of the calculations included on the Snapshot Analytics templated App such as “RemoveDataFlag”, “SnapshotFilterFlag”, and “IsMostRecentSnapshot” so you might need to calculate these on your own.
Similar to the alternatives above- each Snapshot is a row of data, so it can add up to your Data Row limit pretty quickly.
RESOURCES:
How to add a snapshot from a recipe
https://www.youtube.com/watch?v=ZjndHJc6UHs
Option D: Reporting Snapshots using a Custom Object and custom report type
This option uses the best combo of Salesforce and Analytics: and takes basically 3 pieces:
First Piece- A source report: This source report can be a regular report, either Tabular or Summary.
Second Piece: A target object: We need to create a custom object in our core org in which to store our historical data
Snapshot Configuration: Takes the Output of the report and writes it to the custom object
Step 1: Create a source report: I created an Opportunities with products report

Step 2: Create a target custom object that has the fields you wish to trend on
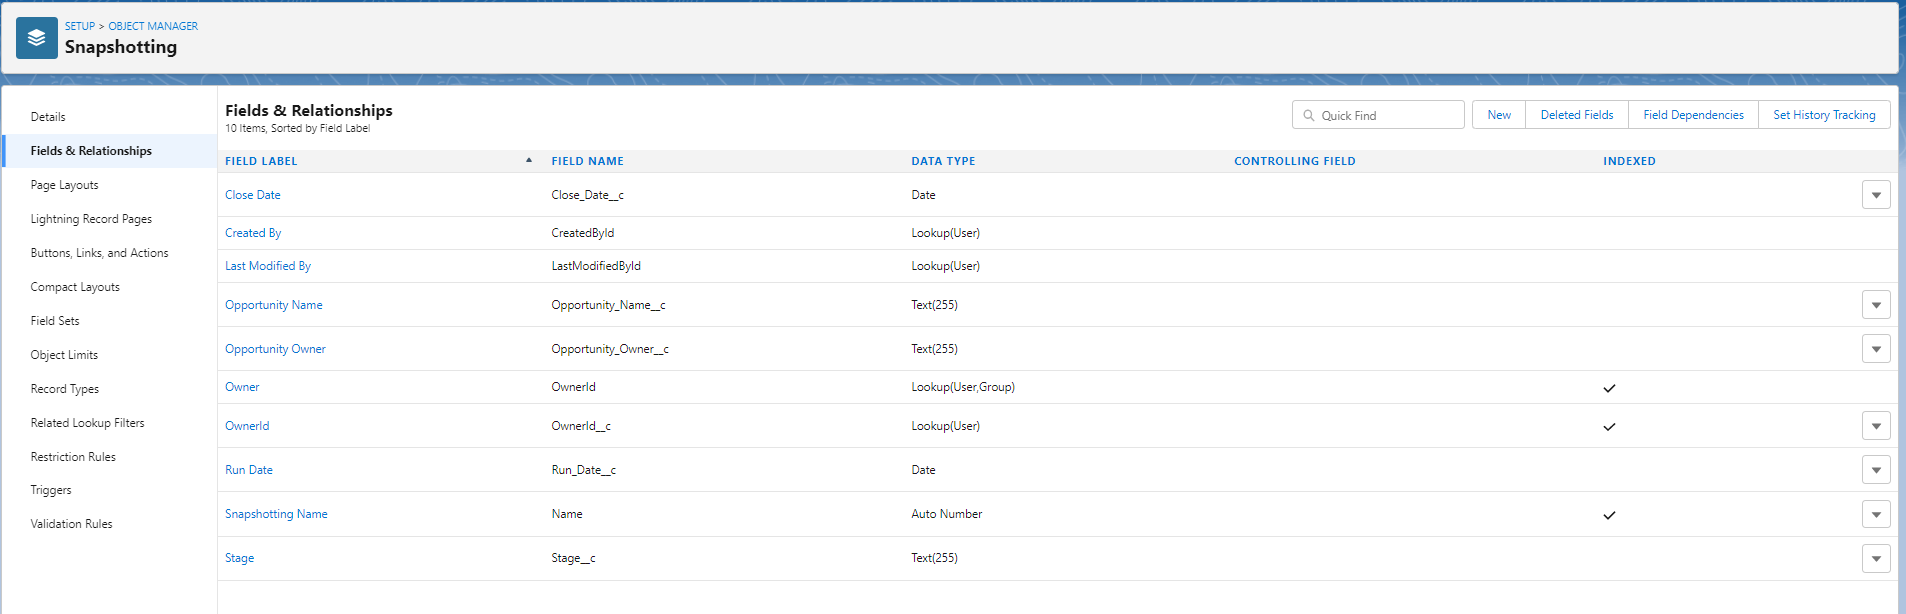
Step 3: Define your reporting snapshot > go to Setup >enter “Reporting Snapshots” in the Quick Find box and select “Reporting Snapshots” > click New Reporting Snapshot and enter Running User, Source Report and Target object.
INFO ON THIS STEP: Link

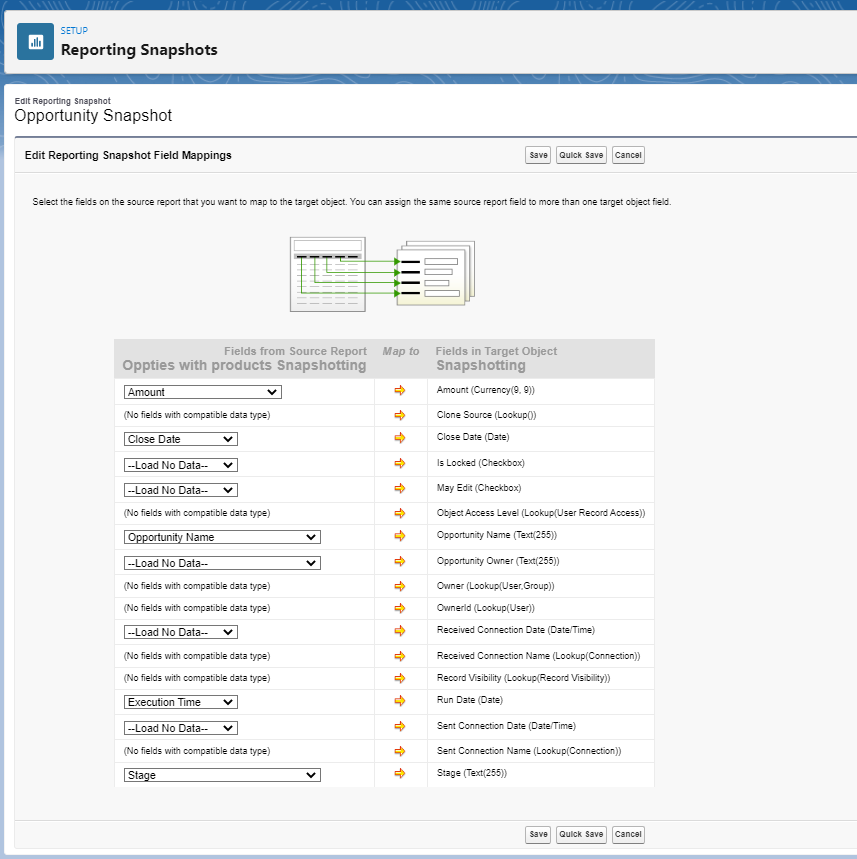
Step 4: Map Reporting Snapshot Fields > After you create a source report, target object, target object fields, and define your reporting snapshot, you can map the fields on your source report to the fields on your target object.
Step 5: Schedule your reporting Snapshots
Pros:
This stores our data in an object; a custom object is optimized, vs our 3 options above are storing data in a Dataset.
Cons:
It requires creating a custom object; if a user cannot create a custom object, this will not work
The storage counts towards a Salesforce Object
RESOURCES:
https://help.salesforce.com/s/articleView?id=sf.data_about_analytic_snap.htm&type=5